Omnomicon

say it with me now, "om nom nom!"

9:48 PM

fail pie

Posted by aleta meadowlark |


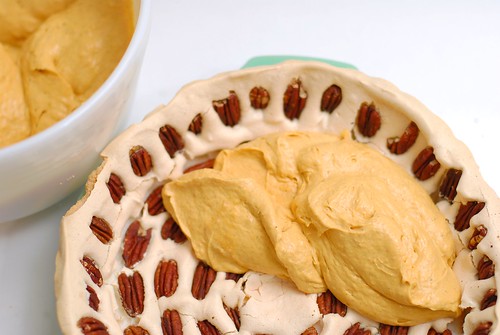
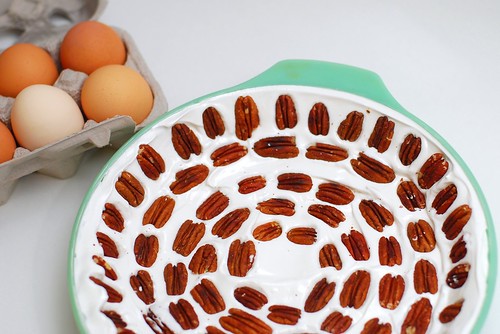
A pumpkin cream pie served in a pecan-studded meringue crust.

That, right there, was supposed to be my masterpiece. This was going to be a winner recipe, and I imagined the food blog equivalent of everyone hoisting me on their shoulders and carrying me away to a raucous victory party where everyone brought something they made from a recipe on my blog and we all drank and hugged and had merry times until five the next morning.

fail pie


How very, very wrong was I.

This mish-mash of ideas I found in various places come from individually neat ideas unto themselves, but plain silly when put together. For one thing, beginning to end, this stupid thing took me about seven hours. Seven freakin hours, can you believe that? On a weeknight, no less, so after getting home before five, I collapsed in bed around 1am (I know that's more than seven hours, but I take a little while to wind down).

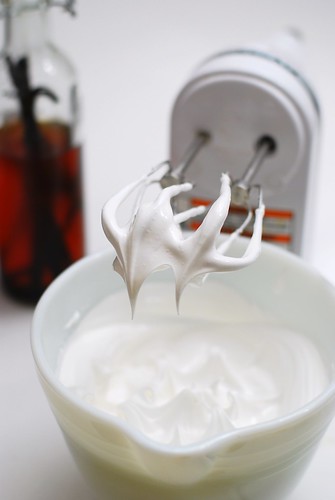
The meringue takes about 30-45 minutes to whip up, then bakes for an hour. During which time there is nothing to fill the void, because we don't want to do anything with the pudding mix so it won't set anywhere but on that crust. The crust that bakes for an hour. Then cools for two hours.


fail pie


Making the filling is easy enough. Except that after you put it in said crust it needs to chill for an hour.

fail pie


fail pie


On top of all that, I put too much sugar in my first meringue, so add about 45 minutes before I realized that this potion was never going to get stiff peaks. Then, just at the end of the final cooling, I started a caramel sauce from the Joy, but of course, this was not the kind of sauce I meant it to be, so after burning my finger with sticky hot sugar, I tried another batch. And then added too much water at the end. We'll only count the last half hour of that, since the first half was spent waiting.


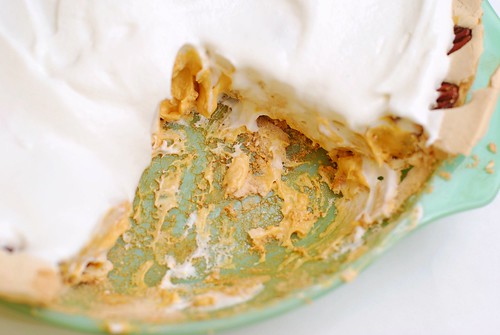
Then I cut into the pie to take a nice picture.

fail pie


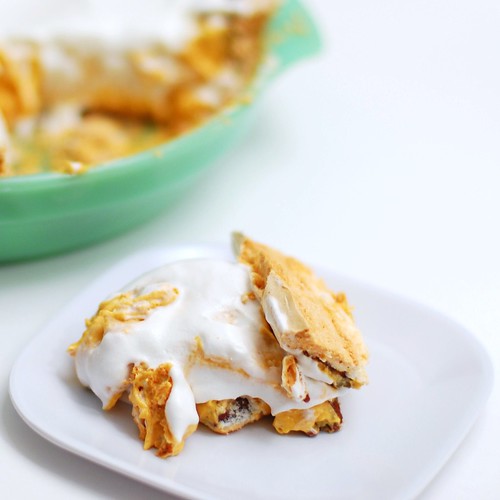
Look at that friggin thing! What a mess! It is so pathetic that it looks like it's hanging its head in shame, and it's a slice of pie, how could it even do that? I don't know, but it is.

The meringue crust is not the worst idea in a world full of crusts made out of Crisco, but you can't make this more than 24 hours before it needs to be done, or else all the moisture from the pie will turn it into a gummy mess. And I don't know why it stuck so fervently to the bottom of the pie plate, I oiled that sucker and everything! The flavour combination was pretty great, though, and this idea may be salvageable. But right now . . . I'm too tired to salvage.

I'm sure I'm not alone in this. What's the biggest kitchen disappointment you've been on the receiving end of? Did you manage to salvage anything from it?

10:20 PM

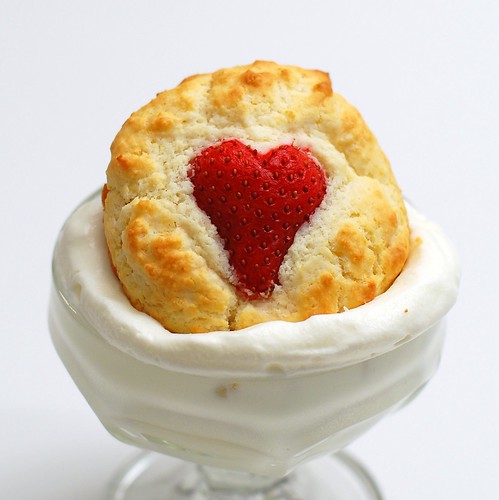
strawberry heart shortcake cupcakes

Posted by aleta meadowlark |

So I know diet diner food isn't a great sell for everybody, and frankly, I think baking takes far prettier pictures. That said, I have, for Valentine's Day, a visual gift for all y'all. Strawberry shortcake is a beautiful thing all on its own, but for dessert for two, it can be improved upon.

Generally, in place of shortcake, I make some sweet biscuits, slice 'em open and throw some sugary strawberries and whipped topping on there. However, I've been reading aaalllll about different flours and decided to try out the theory that the low protein levels in cake flour makes for a more perfect crumb.

OH MY GOD, I will never go back to all-purpose flour. All-purpose flour varies from region to region and season to season, so while in theory it can make for a seasonal flair, there's something to be said for fabulous consistency. This recipe makes a tender, delicious, and all-around omnommy shortcake biscuit.

Enter strawberries.

Strawberries.


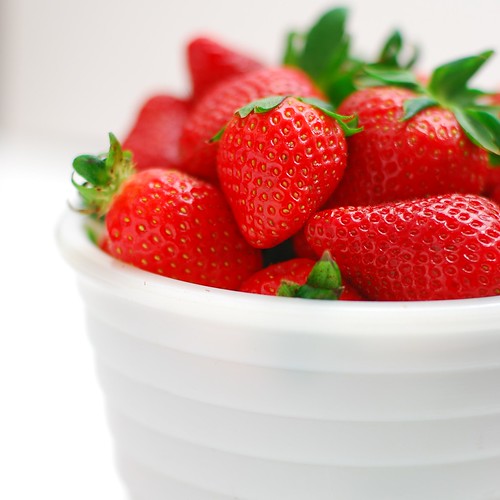
They're out of season, but available in most stores. Do yourself a favour and throw out any that aren't red inside. White strawberries are blech, ugh, and above all else, yucky.

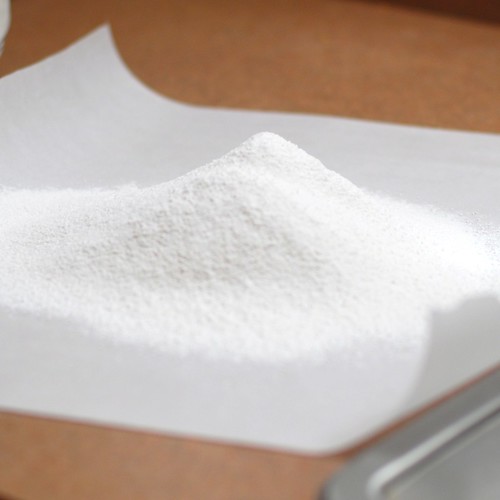
Here's how to measure your flour perfectly. First, sift onto a flexible cutting board or, as seen here, parchment paper.

Flour!


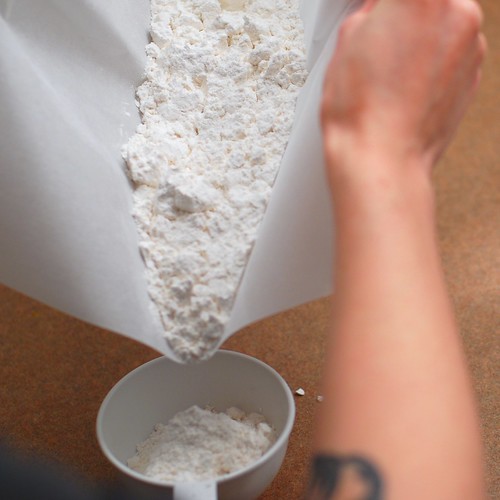
Funnel the flour into the measuring cup. Oh hey, bitch has tattoos, check that out.

Measuring . . .


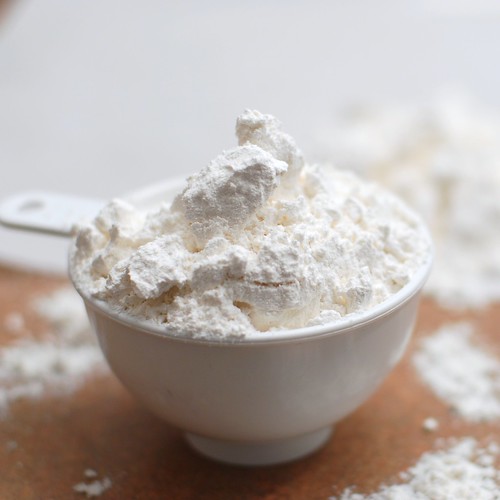
Overfill the cup with flour, and DO NOT shake to level it off--this repacks the flour and undoes all your fancy sifting.

Abundance.


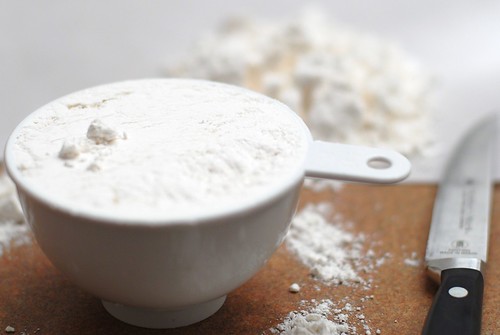
Instead, kinda slice off the top with a knife into the sink, or back into your flour bag/box if you can manage it. It's messy, but it's the best way.

Cut!


Use a pastry blender or two knives to blend the butter into the flour until it kinda disappears in there. Then add some heavy cream, light cream, or fat free half and half. This is a batter rather than a dough, so no folding out is required, and it will be goopy.

Pre-shortcake.


And hey, back to the strawberries! Except this time they're seasonally-themed.

I <3 strawberries.


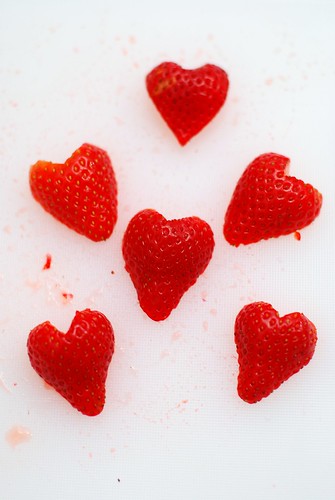
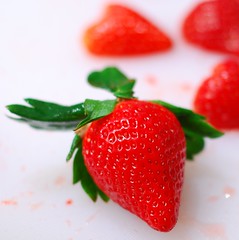
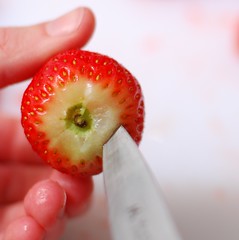
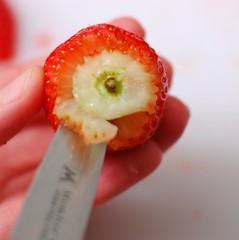
Select the pointiest berries to create the hearts. Then remove the stem and carve out the little stem-pit there. Also, this berry was a poor example, as there was a lot of white under that stem.

Pointy berry.Shink!Scrooch!


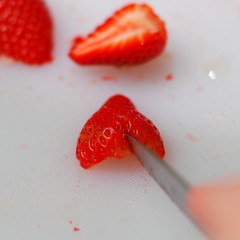
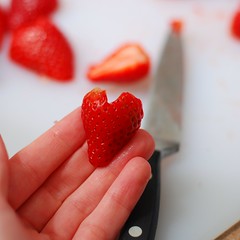
Cut the strawberries in half length-wise, then carve a little V out of the top. To further carve out the heart-shape, slice from the already-sliced side and round out the edges. This takes a little bit of practice, and I really didn't know how to show it in photos (sorry!). Really, though, the strawberries are going to be pushed into the batter anyway, so the edges really don't have to be all that perfect. They just take better pre-baked photos that way. And that's how to make strawberry hearts.

V . . . not consummate, sadly.<3.


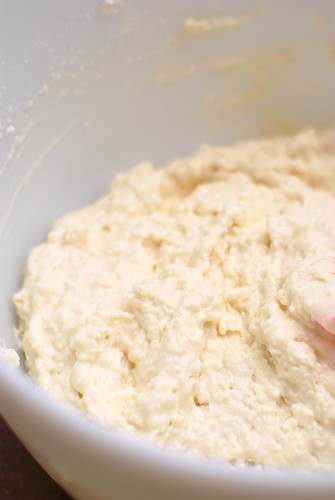
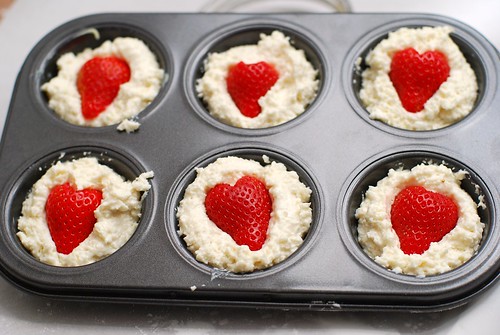
Scoop two heaving tablespoons of batter into each spot of your muffin pan, then press one of the strawberry hearts into each.

Oh look, it's all my love.


Then bake to perfection. And hey, don't serve yours this way . . . you need to serve it with sugared strawberries. Really. Trust me. This just took the best picture.

Much love.


Strawberry Heart Shortcake Cupcakes
makes 8 cakes

1 lb fresh strawberries.
2c sifted cake flour (if using all-purpose flour, which is not recommended, reduce to 1.75c sifted)
1 tbsp baking powder
3 tbsp sugar (1 tbsp for the shortcake, 2 for the strawberry topping)
1/2 tsp salt
6 tbsp cold butter
3/4 c light or heavy cream, half and half, or fat-free half and half
Whipped cream, whipped topping, or cream-in-a-can

Rinse the berries, reserving 8-10 small to medium ones with pointy tips. These will be your hearts. Heat the oven to 450.

Slice remaining strawberries into quarters and toss with 2 tbsp sugar to coat. Set aside.

Sift flour on a flexible cutting board or parchment paper. Gently pour into measuring cup, then level off with a knife. I'll repeat it again just in case you missed it the first time: do not level off by shaking or tapping the measuring cup. You'll get dry nasty muffins, and nobody wants that.

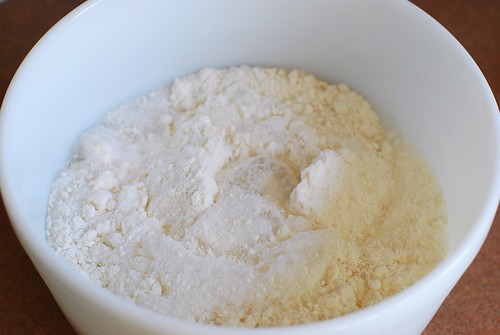
Sift the sifted flour AGAIN, this time with baking powder, salt and sugar. Cut up the butter, which should have been in your fridge all this time, a little bit to get the blending going. Dump into the flour, then use a pastry blender or two knives to blend together. You're done when there are no remaining chunks of butter in there. Add in the cream or half and half all at once, then mix until all ingredients are moistened.

Let that sit a bit while you create your strawberry hearts. Pull off stems, carve out the pit with a paring knife, then slice in half. Shape each half into a heart by carving a V at the notch (where the stem used to be). Since the berries will be pushed into the dough, the edges don't need to make a perfect heart, but the V at the top is pivotal.

Bake for 12 minutes. Remove from oven, let cool a minute or two in the pan, then transfer to wire rack to cool. Serve to your dearest love with the sugared strawberries and whipped cream.


Love, Aleta.

Love,
Aleta

11:02 PM

how to make a rainbow cake!

Posted by aleta meadowlark |

[Edit: no children were harmed in the making nor consumption of this cake.

People seemed to miss the point that I am a 25-year-old woman on a diet with no kids. Since kids don't really need fat-free anything, there's no need to use the soda recipe if you don't like the idea, and if you don't like dye, don't make this for dinner for them every night for a month. Okay, folks, thanks for the allowance to disclaim.]

Aaannnndddd, she's back!

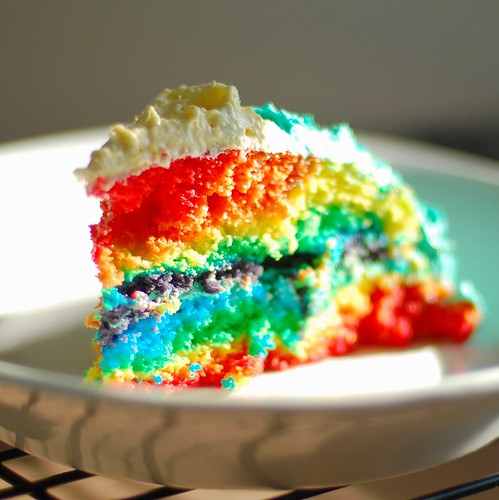
So I did mention something about health and/or diet food in my last post, and while this recipe is the latter, it is most certainly not to be confused with the former. I posted about my rainbow cake here, and it got a lot of traffic on over to my livejournal, and everyone wanted the "recipe." The cool thing is that if you're making something so distractingly colourful, people will think it's delicious no matter what.

This presents me with the option to use an old Weight Watchers trick—the one-point cupcake. Except I'm making a cake and I created my own frosting. Kinda. I've seen it done before, but I swear I made it up first!

This cake is suitable for many occasions:

  • A child's birthday
  • Your mom's birthday
  • Coming out to your conservative parents
    • If you're a lesbian, they'll be thrilled that you won't be forgoing your feminine kitchen duties.
    • If you're the kind of gay dude who makes cakes for your parents, they were probably on to you anyway.
  • Coming out to your conservative parents on your mother's birthday
  • Your friend's jam band CD release party


. . . so I'm sure you'll find a use for this recipe soon.

And of course, you can use any white cake recipe you'd like. This is just how I make it because I have delusions of wearing size 2 someday.

Oh yes, and do me a favour: DOUBLE THE RECIPE AS PHOTOGRAPHED HERE!! The recipe at the bottom is accurate, but this made for a really REALLY small cake, and there was not nearly enough frosting, especially considering its lightness.

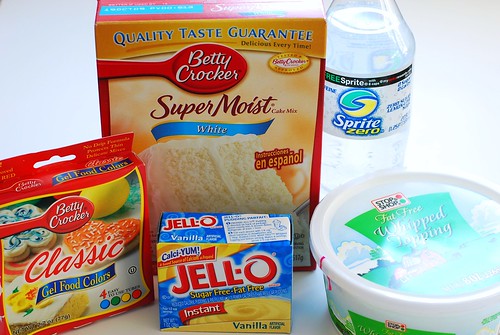
Okay, on with the ingredients.


how to: rainbow cake!


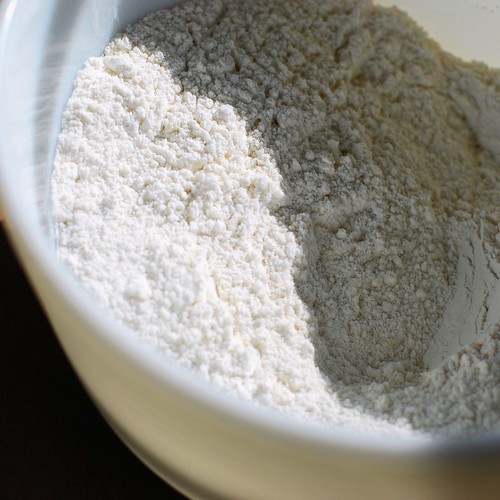
That's all. Notice the lack of fat in here? Mmmmmm . . . chemicals. Though I don't need to defend my method thanks to the double-dub (WW) aspect, even when I make a "real" cake I usually use box mix because let's face it: Betty's been doing it way longer than I have, and has pretty much perfected the art.

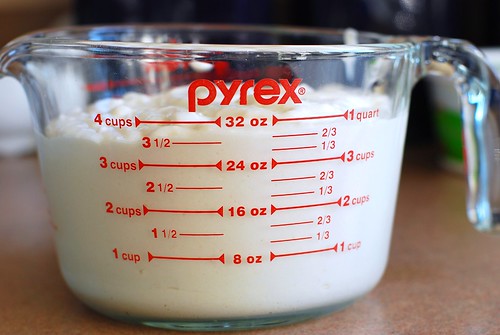
Pour a can of soda (12 oz) 2-12 oz cans of soda into the cake mix two boxes of cake mix. No eggs, no oil, no water, no sweat.


how to: rainbow cake!


The action shots weren't too thrilling. Now we measure it.


how to: rainbow cake!


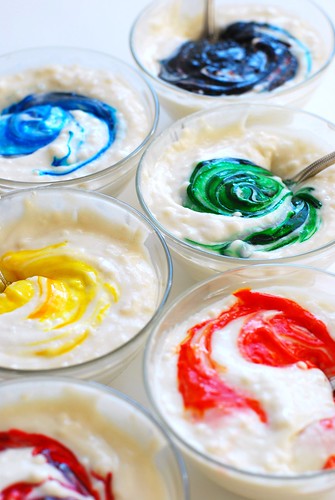
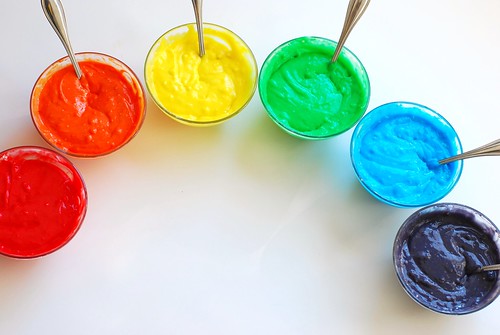
I'm going to round to 30 oz 60 oz because I have six colours and isn't that just too convenient? It worked out to 3/4 c 1.5 c per colour, measurementwise. So I divvied that up and used my gel colours.


how to: rainbow cake!


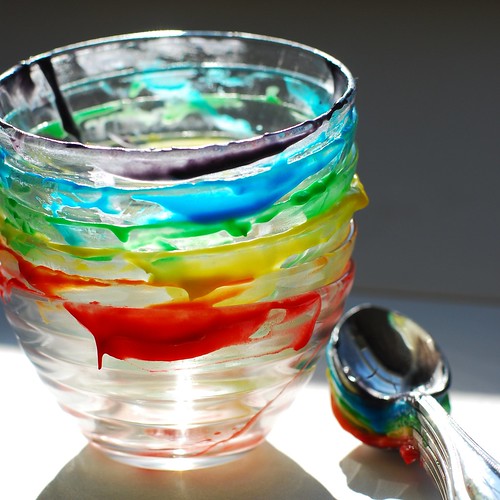
(the gel colours, while not as good as pigment dye, are much bolder than the very liquidy food colouring you probably grew up with)


how to: rainbow cake!


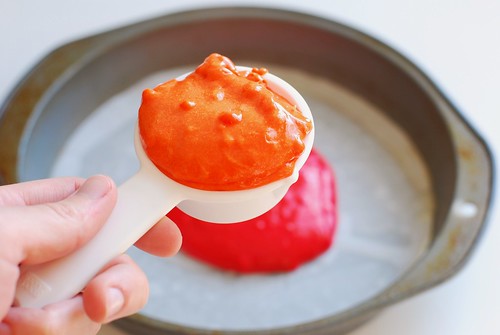
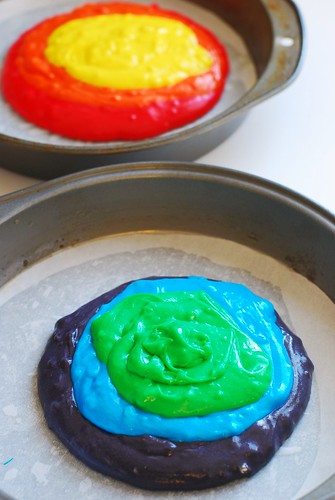
The first colour you drop into the pan, use about 2/3 of the mix for that colour. Otherwise, the top (last) colour will really dominate. I used a heaping 1/4 c 1 cup of each colour.


how to: rainbow cake!


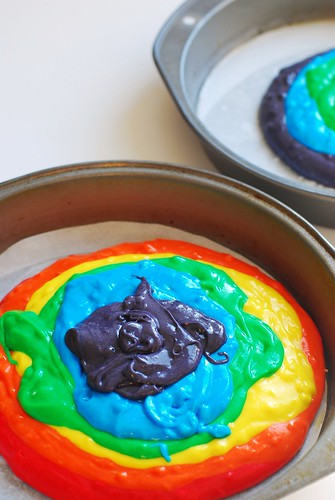
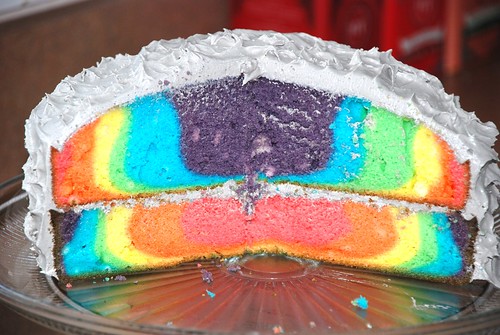
Drop the colours, one by one, into the middle of the pan, in neat concentric-ish gobs. Remember the cake is going to be sliced in the side there, so mixing it around on top isn't going to make your slices any more psychedelic (trust me, I did the three-dimensional thinking for you already).

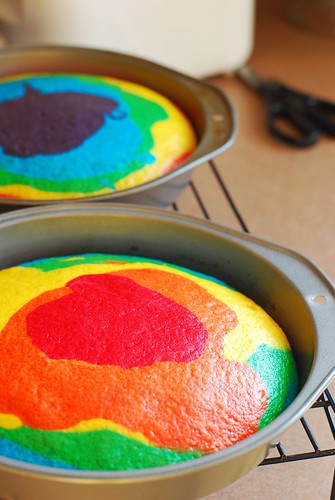
When you're three colours in, start doing the reverse with the other pan. Since I'm going in rainbow order: red, orange, yellow, green, blue, purple, I got from red to yellow in the first pan, then purple, blue, green in the second. This is so that your two pans are equal if your measurements aren't exact (and they're not likely to be).


how to: rainbow cake!


Now finish up.


how to: rainbow cake!


Follow the box's baking instructions and do your dishes.


how to: rainbow cake!


Such lovely dishes!

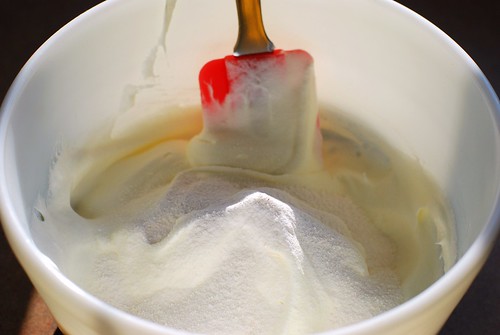
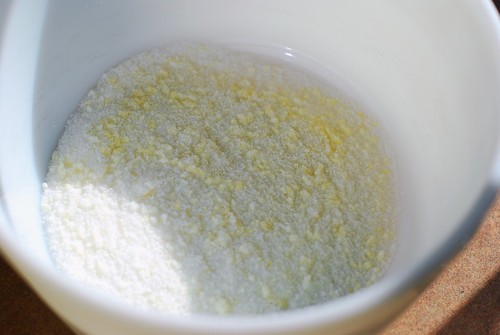
Now for the frosting: 1 box 2 boxes of fat free sugar free pudding mix, and 8 oz 16 oz (two of the 8 oz tubs pictured) of fat-free whipped topping. Or sugar-free. Or light. Or regular. They're all pretty much the same. But that's it.


how to: rainbow cake!


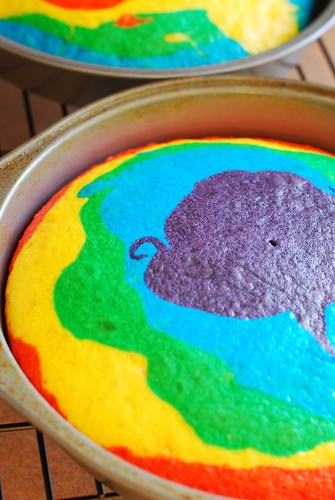
Holy shit, the cake's done! Toothpick clean and everything! Get that shit out of the oven!!!


how to: rainbow cake!


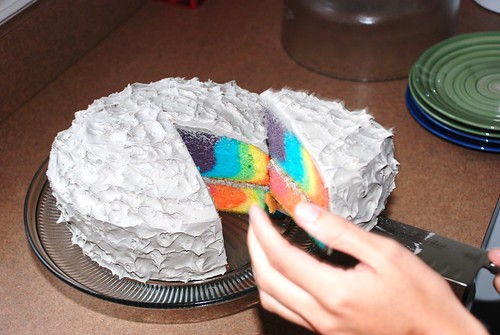
The purple top kind of made a little turkey silhouette.


how to: rainbow cake!


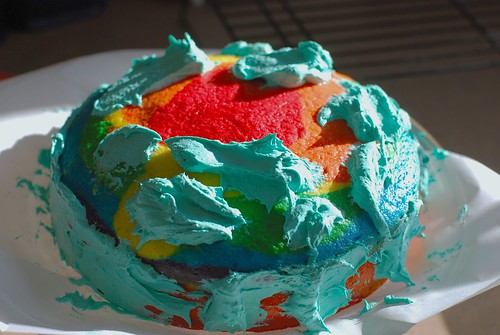
The frosting will be a little tough to spread, so treat it like a buttercream (I guess, I've never frosted a cake with buttercream). Putting gobs all over, then smoothing in worked well for me.


how to: rainbow cake!


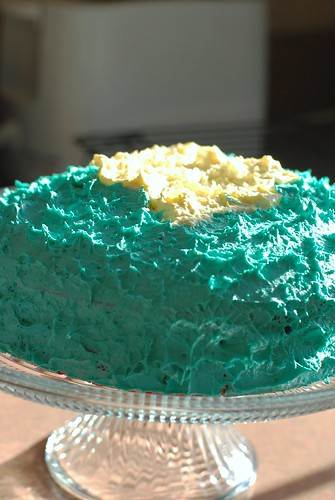
And look at that thing! It's so pretty-lookin.


how to: rainbow cake!


Here's what this particular cake looked like. See how it's tiny and too rounded and it kind of isn't all that great? That's because I didn't double the recipe. It's a mistake I'll only make once.


how to: rainbow cake!


Here's what that really should look like: same process, twice the batter.


DSC_0598


Mmmmm.


Sunny Day Rainbow Cake

2 boxes white cake mix
24 oz of clear diet soda (2 cans, ginger ale and sprite work well)
gel food colouring
16 oz whipped topping
2 oz instant fat-free sugar-free pudding mix (2 smallish boxes)

The Dieting
Mix the cake mix with the soda according to regular instructions on box. It will be lumpy afterward. Again, you can use any white cake recipe you want, this is just how I do it.

The Rainbowing
Measure the total volume (by my estimate, 64 oz), then divide by 6 and measure into separate bowls. There are 8 oz in a cup, so 64/6 = 10 to 11 oz, or 1 cup + 2 tbsp.

Stir colour into each bowl with its own spoon. For the first colour into the pan, measure out 2/3 to 3/4 of your mix (in this case about 1 c) as close to the middle as you can. Drop in your first three colours, then work on the other pan with the last three colours. So if you're doing rainbow order, the first pan should have red, then orange, then yellow, and now the purple, blue and green go into the second pan. As a recap, this is so both layers are roughly the same size.

Bake the cake as instructed on the box. Check it when the box says to, but usually it'll need an extra 5 or 10 minutes because of the density of the soda method. Just keep baking, checking back every 5 minutes or so until a toothpick to the center comes out clean. Let cool completely before moving to a wire rack.

The Frostinging
Meanwhile, make your frosting. Just mix the pudding mix in with the whipped topping for a few minutes. Dye if you're into that.

Frost your fat-free cake with your fat-free whipped frosting. Eat.


DSC_0603


A note to Weight Watchers (the people on the diet, not the company):
WW has long advertised 1/12 of a cake mix with diet soda to be a "one point cupcake." I have no idea why they insist this is the case when according to the "as packaged" nutrition information, this much cupcake has 170 calories, 3g fat and no fiber . . . by my calculation, that's 4 points. That said, 1/12 of this recipe, (2 box mixes + 16 oz whipped topping + 2 oz or so pudding mix) works out to 10 points a slice. Not bad considering that a comparable cake would be 14 points.
8:00 PM

oh shit, there's muffins!

Posted by aleta meadowlark |

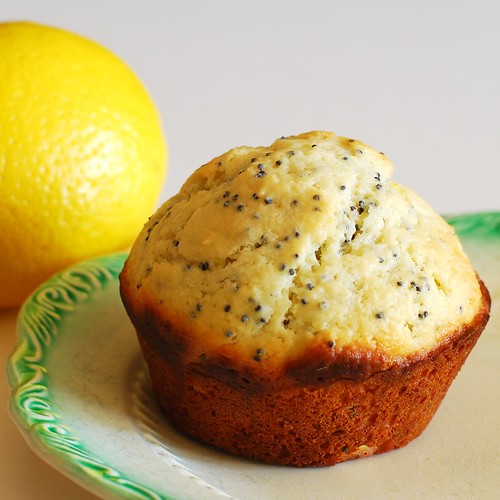
As a wee lass, my mother would, from time to time, break out the box of lemon poppy seed muffin mix and proceed to make muffins on a Saturday morning. I never really understood *why* this was a big deal, other than it had these weird black things in them. At the same time, I ate these with some relish and with two visitors arriving Saturday afternoon (including Dano's banjo teacher), I got the bug to make some muffins. These popped into my head, though I wouldn't be doing it with a mix.

I got the recipe from eat me, delicious, and it's her take on Dorie Greenspan's recipe. I agree with her preference for sour cream (density) and personally, I like butter in muffins instead of oil--the latter seem to end up soggy.

Armed with a lemon, some poppy seeds and fat free sour cream from Stop & Shop, I set out to create heavenly lemony delight. This is a really beautiful recipe, start to finish.

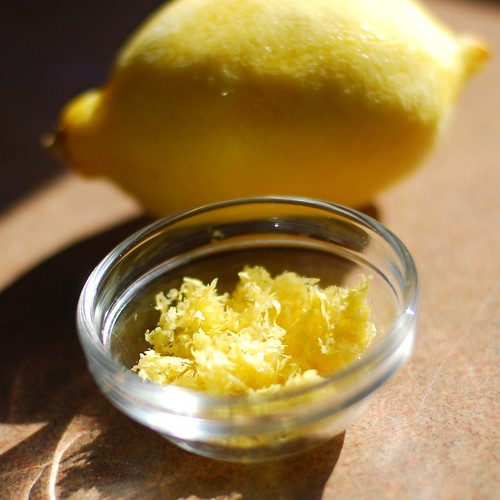
Zesty!


Fun step #1: blending the zest with the sugar with little pinches.

Finger the zest into the sugar.


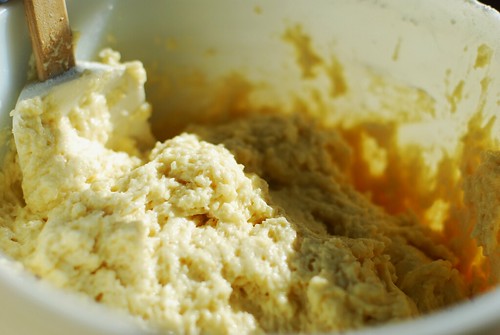
Add some flour and leaven (this isn't the pretty part yet, we're getting there).

Flour and zest.


Wet stuff (shout out to fat free sour cream: Lookin good lady!).

Wet stuff.


Oh man, by now I'm impatient for the licking of the bowl ritual.

Mmmmm.


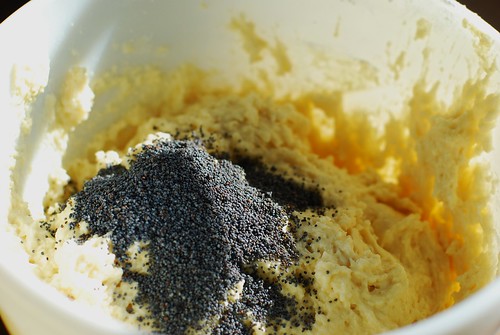
Enter poppy.

Enter seeds.


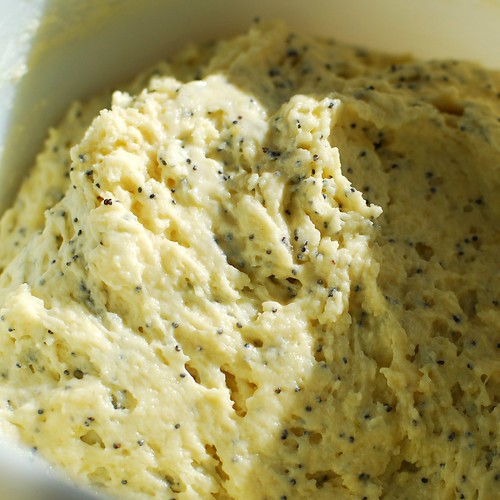
I bet you're totally into this by now. I told you, heavenly! Like, when I think of heaven, this is what the clouds we're all walking on look like.

Oh batter! I can't wait to lick you off the spoon!


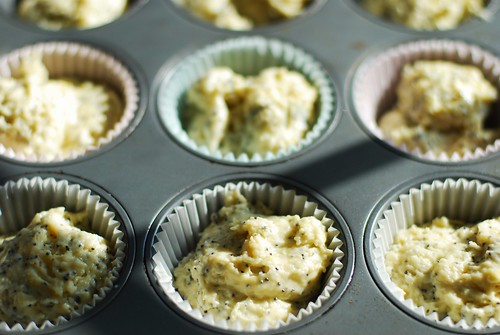
Now I've always wondered what's truly better: buttered muffin pan or muffin cups? I like the muffin cups at this stage . . .

Paper.


. . . but the boys and I agreed that for eating, for eating specifically these muffins? They need to be au natural.

Butter.


eat me, delicious's adaptation of Dori Greenspans's Lemon Poppy Seed Muffins

7:30 PM

spent grain chocolate chip cookies

Posted by aleta meadowlark |

Lookit what I got!

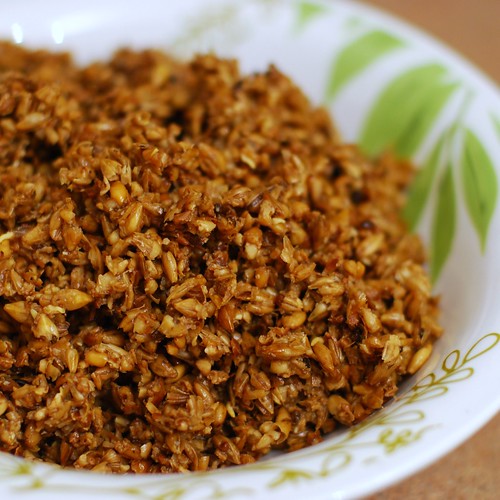
Spent grain.

In case you aren't a homebrewer, that there is spent grain. This is what's left after you brew the beer (but before it ferments), and it's often used as fertilizer, mulch or animal feed. But it's just grains, full of fiber and totally good for you, so my pal Heather filled up a nice big bag for me to play with. What a doll!

I found this recipe and tried a couple batches. The first was the recipe as written (which includes peanut butter—not my favourite), and the second was my little take, sans peanut butter and nuts. And the winner is . . . definitely the recipe as written. Mine came out dense and I daresay even fudgy, but not the good kind like you want. Also, the peanut butter doesn't shine, it just adds to the nuttiness of the grains, and though I could probably work out some butter in its place, I would make this with peanut butter again. I did replace the oil with butter because I think it makes things a little fluffier and I felt these ran the risk of being too dense. But these tasted like super-earthy oatmeal cookies. I used only whole wheat flour and it didn't even taste like dirt!

And hey if you don't have access to these, no worries! I would imagine this recipe would work well for any grain mixture you might prefer. I'm thinking of bulgur in particular, but I'm not big on grain cereals. Since these grains are wet when they go in the recipe, make sure yours are cooked (and wet) before you measure them and toss them in.

Let's take a look!

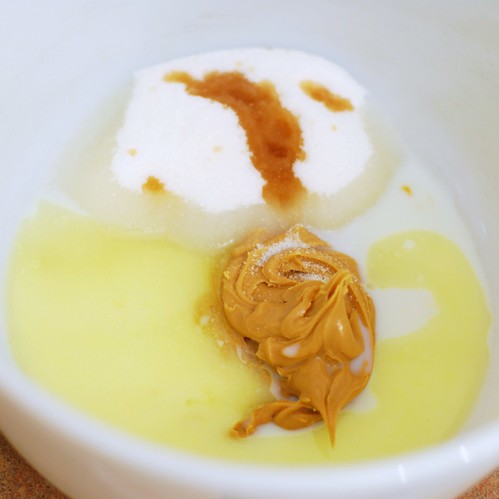
It begins.


Say what you want about the taste and calorie content, peanut butter is beautiful. Onto the dry ingredients.
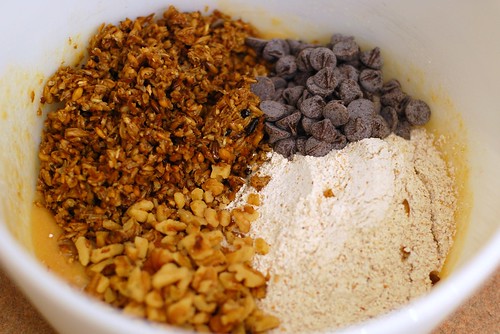
Now the dry stuff.


At this point, I felt like it was time to spread these on a pinecone, and was a little skeptical about the recipe.

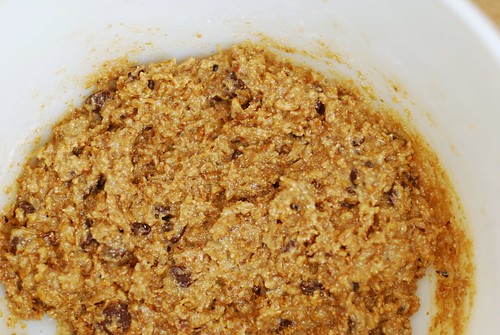
Batter.


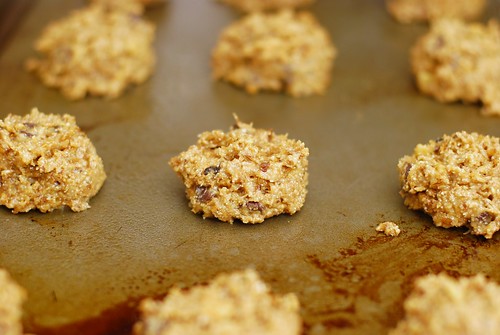
These are generous tablespoons smushed down just a little bit so they'll have a nice cookie shape.

Plop down generous tablespoons.

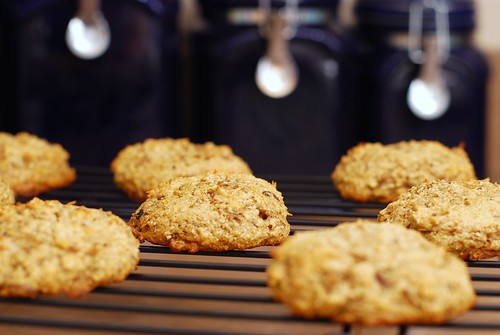
My MY aren't you all so lovely.
Hey kid, cool it!


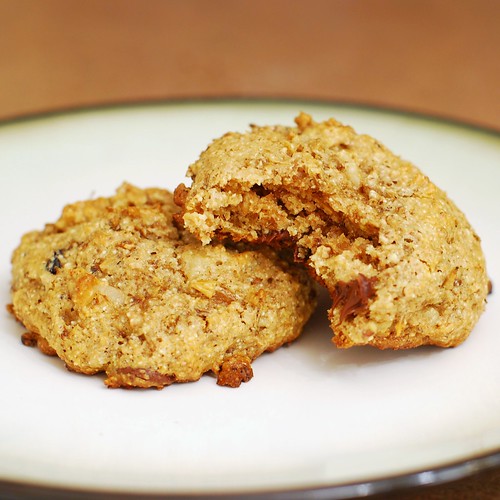
Enjoy!

Tender, cakey, delicious, healthy.


Nutty Spent Grain Chocolate Chip Cookies
Adapted from a recipe featured by Seven Bridges Cooperative.

1/3 cup peanut butter
2 tbsp melted butter
1 cup sugar
1/3 cup milk
1 tsp vanilla
1.5 cups spent grains (or alternatively, 1.5 cups of your favourite grain meal, prepared and still wet)
2 cups whole wheat flour
1 tsp baking soda
1/2 tsp salt
1/2 cup chocolate chips
1/2 cup chopped nuts

Mix in the peanut butter, regular butter, sugar, milk and vanilla. Then add the flour, baking soda and salt. Once that's all mixed, stir in the nuts and chips.

Bake on a greased cookie sheet at 425F for 8-10 minutes until the tops are just getting golden, but before the bottoms burn. Let sit on the pan for about five minutes before transferring to wire rack to cool. Serve with love.

Makes about 2 dozen cookies after batter sampling.


Subscribe